We have previously produced tutorials on how to reproduce complex screens for iOS using SwiftUI. This article is the first in of the replicating series for Android, using Google’s declarative UI framework: Jetpack Compose.
Screen Structure
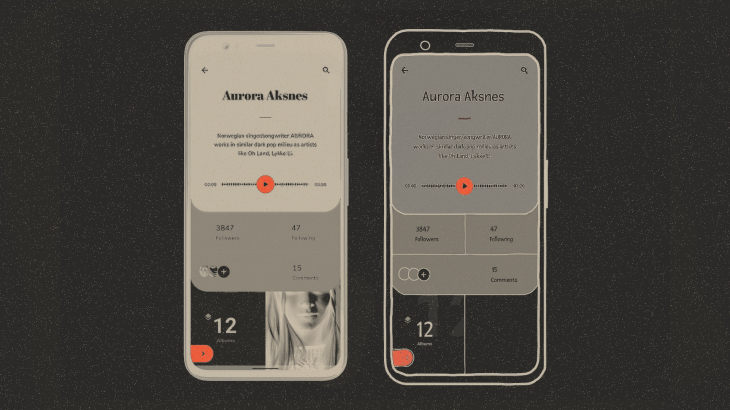
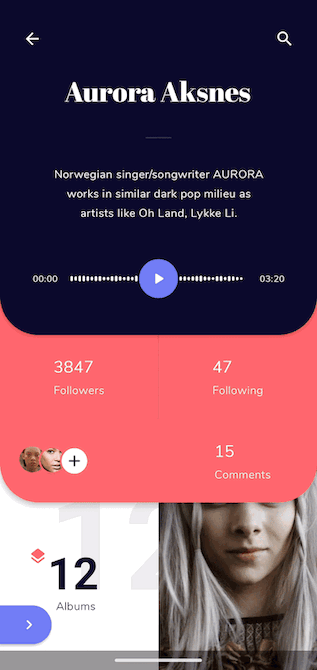
Our app will consist of 3 screens, with animated transitions between them (design concept by the talented Taras Migulko @dribbble):
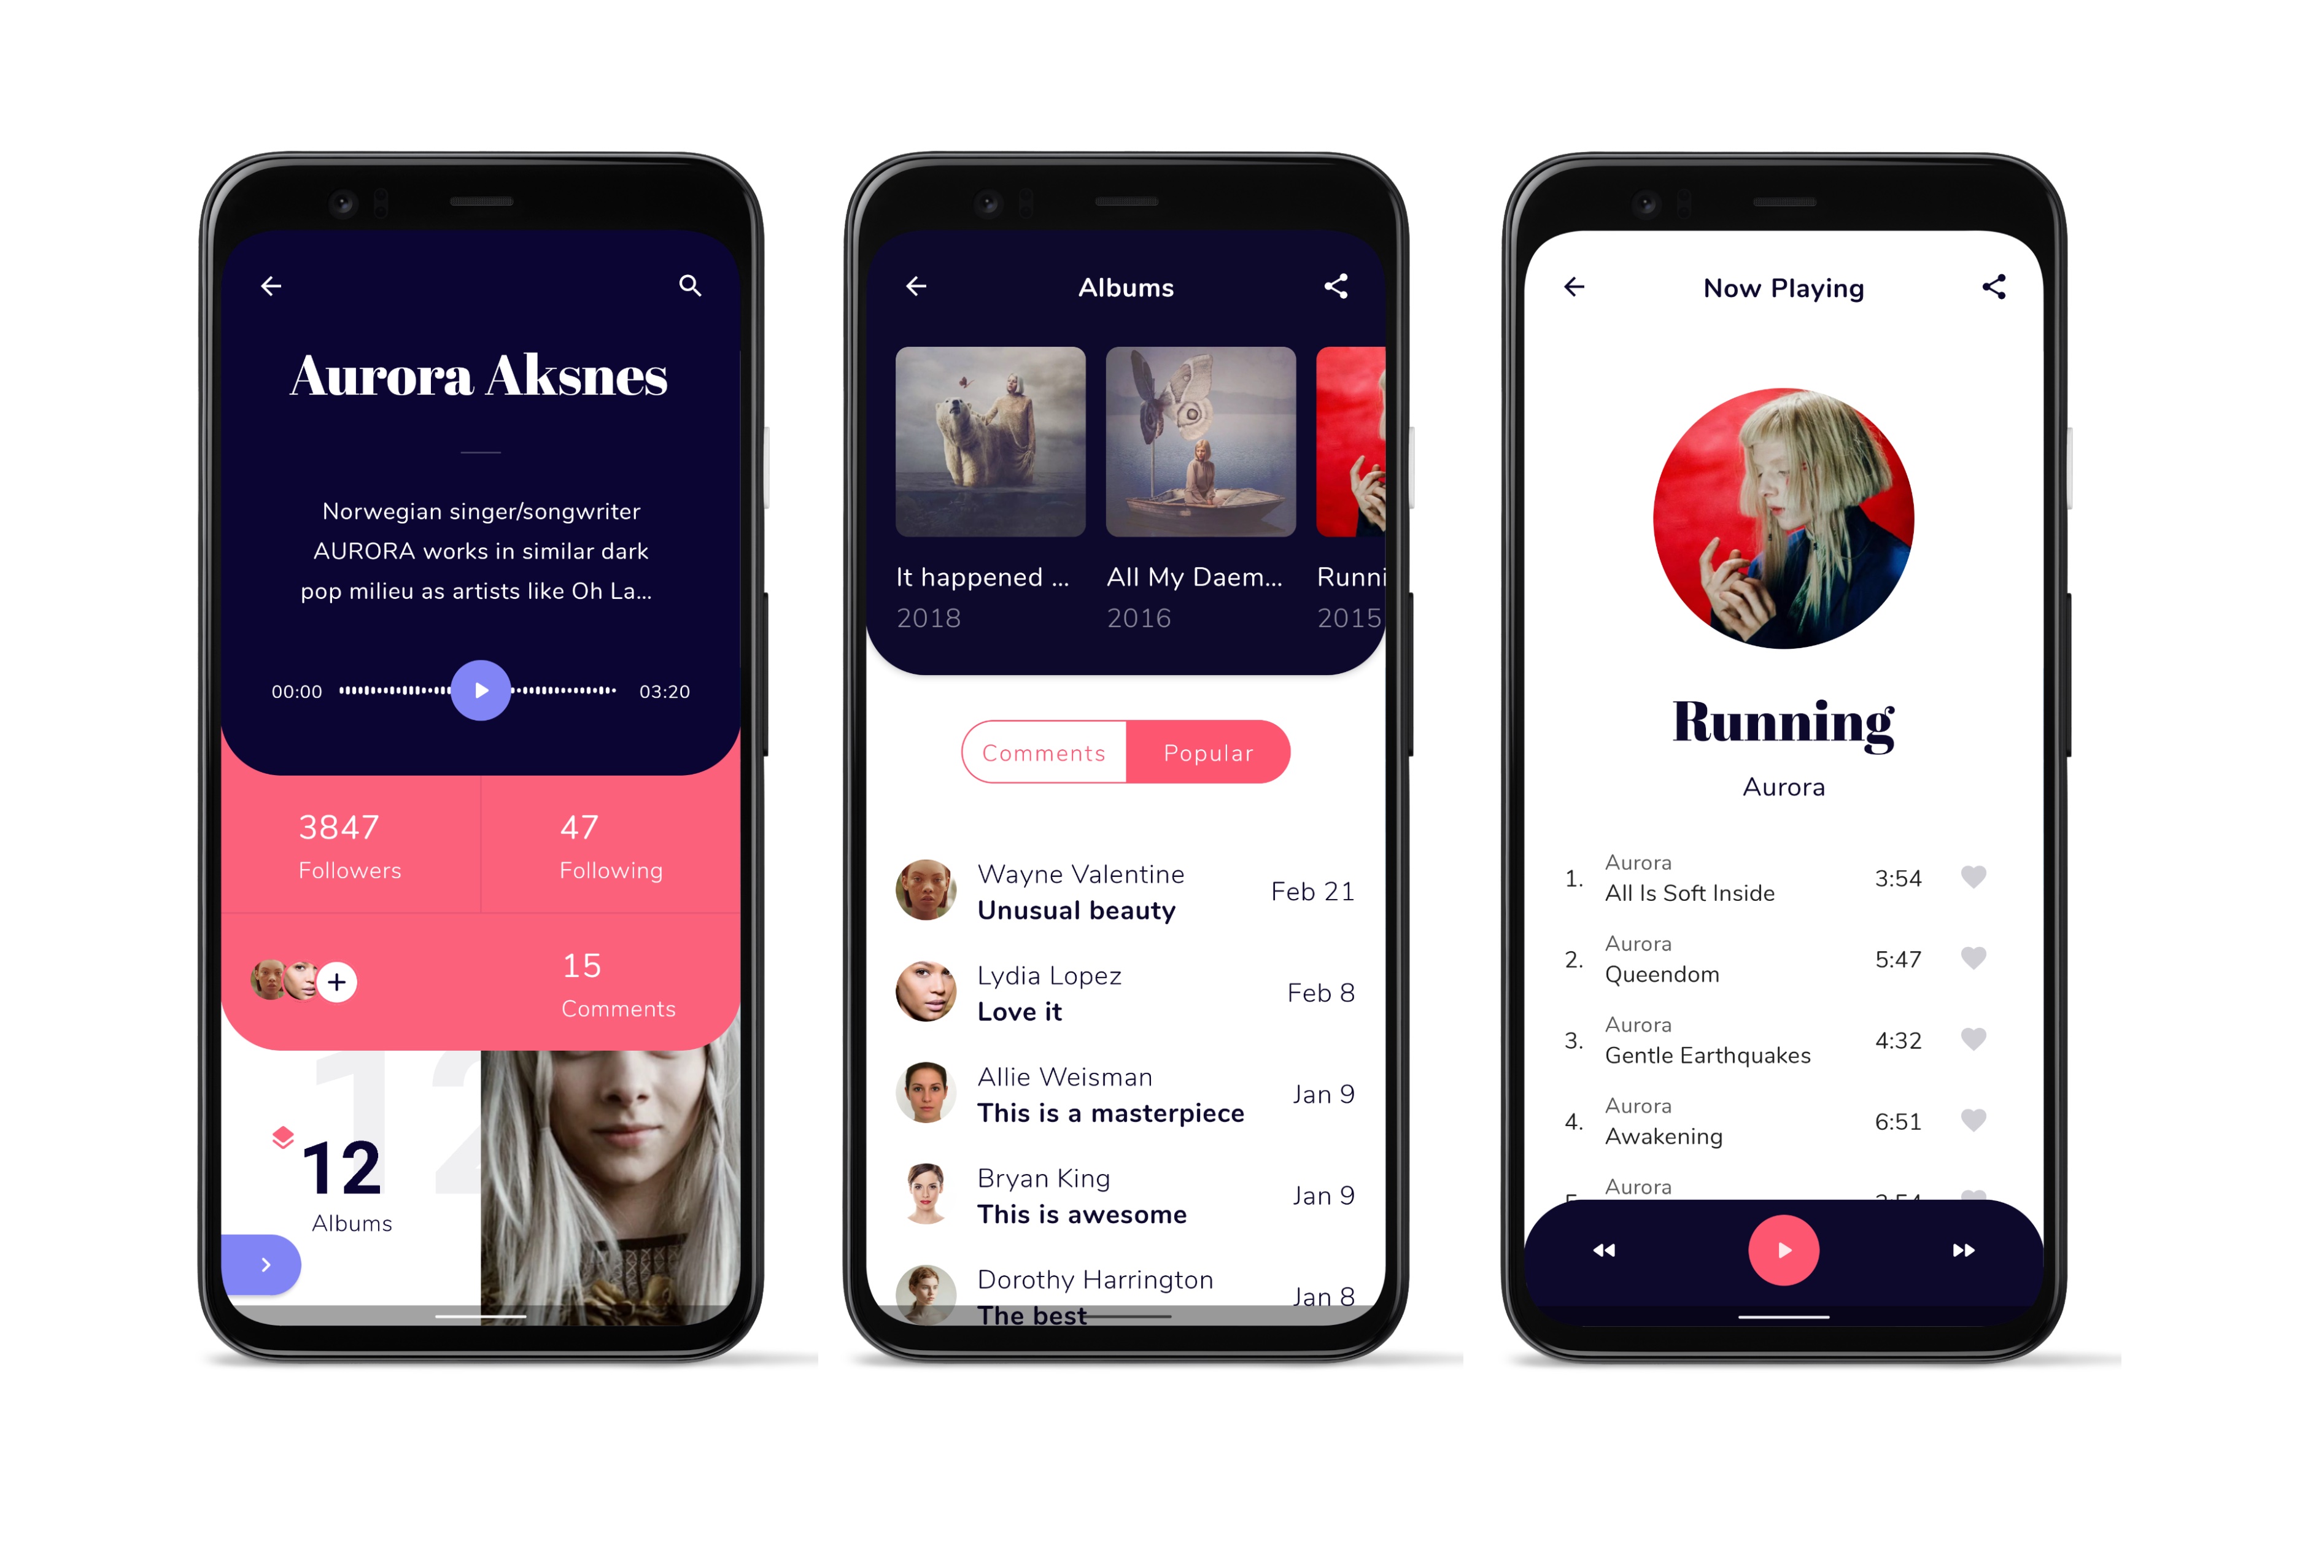
For ease of reading, replicating these screens will be discussed in multiple articles that cover the following UI elements and animations:
- Waveform from the first screen
- Action panel from the second screen
- Collapsing Header from the third screen
- Drag gesture transition
- Shared element transition
We will start the series with animating the Waveform.
Creating the Waveform
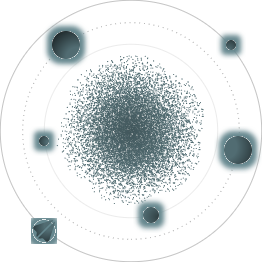
Here is what we want to implement:

The entire element consists of animated vertical volume bars, spaced at a regular distance from each other. Let's look at the basic dimensions we will be using:
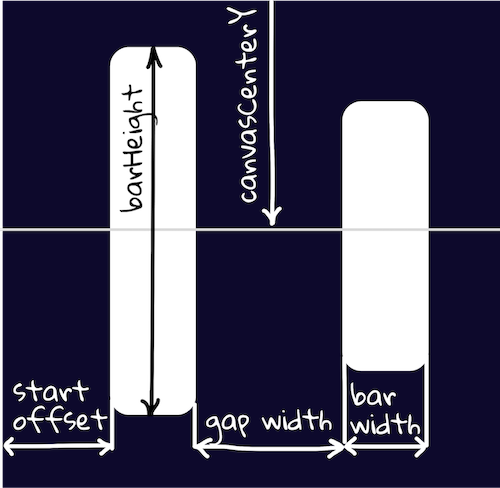
As you well know, the world of Android devices is rich in screens of different sizes, and this poses the following question - how to present the waveform on the screens of different devices so that it takes up all the available space available? To make this widget fit the full width of the screen, you can increase the width of the lines proportionally or you can increase the number of lines.
We chose the second way to preserve the crispness of the image. In this case the first step is calculating the necessary number of lines. To do that, we’ll need to divide the available canvas width by the size of a single volume bar (bar width + gap width). Also, we need to use toInt() instead of roundToInt() because we only want to use elements that fully fit the size, regardless of rounding.
Next, calculate startOffset:
To show the absence of audio output, we reduce the amplitude of height fluctuations. Let’s define the max and min values for bar heights:
The heightDivider parameter will differ depending on the audio state: idle or playing. For smooth transition between these states, we can use:
For infinite animation we use rememberInfiniteTransition(), where animations is the list of elements that will be animated, and random is a property that helps us randomly change the animation time.
Now let's look at the animation. Animation of all the bars would take a heavy toll on a phone’s battery life, so to save resources, we only use a small number of Float animation values:
To prevent the animation from repeating every 15 lines, you can set randomized initialMultipliers.
Now we carry out the following operations for each line:
1) Get random height values, in our case they are repeated every 15 times.
2) Add initialMultipliers to currentSize to reduce the chance of values repeating each other:
3) Use linear interpolation to smoothly resize the height:
Once you have the dimensions, you can draw a volume bar (1) and calculate the offset for the next volume bar (2).
For a better understanding, here is the entirety of the combined drawing code that runs in the loop:
This concludes implementing the variable-width animated waveform. Next installment in the series will demonstrate implementing the Action Panel. See you there!